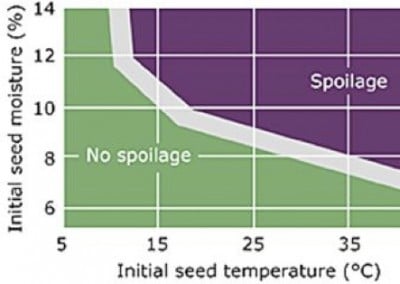
Aeration can be enough to dry tough canola to safe storage levels – as long as air has “capacity to dry”. Damp canola will require heated air drying. Safe levels for long-term storage of canola are grain moisture of 8% and grain temperature of less than 15°C.
Canola is considered “tough” at moisture levels between 10 and 12.5% and “damp” is anything above that, according to the Grain Grading Guide. To dry tough canola with aeration, the bin needs adequate airflow and that air needs “capacity to dry” – which means it has to be warm with low relatively humidity (RH). (See the In-bin drying heading below.) Damp canola will require heated air drying and rigorous management to condition it for safe storage.
Grain dryers (heated-air drying)
Dry canola as soon as possible. While waiting, aerate continuously if possible and move damp canola back and forth between storage facilities to prevent spoilage. The combination of aeration and movement is ideal.
Have the right equipment. Continuous flow or re-circulating batch drying systems are preferable. They reduce the potential for seed damage from heating and allow for slightly higher drying temperatures. For very damp canola, growers may prefer to run the grain through twice at a lower temperature to prevent seed damage and reduce the risk of fires. Also, if the dryer has screens, make sure the screen size is small enough to hold canola. Another option is to add heat to a bin aeration system. Talk to your bin and fan supplier for details.
Watch drying temperatures. Check the maximum safe drying temperature for your system, then reduce it by 11°C when working with damp canola as opposed to tough. As moisture content increases, it gets much easier to “cook” your canola in a heated air drying system.
Over dry canola slightly when using heated air. As grain cools when moved into storage, moisture content tends to rebound slightly. Over drying compensates for this. A general rule is to over dry by 0.1% for every point the grain is dried. For example, if canola is at 14% moisture and your target is 9%, over dry by 0.5 percentage points to 8.5%.
When returning warm, dried canola back to the bin, turn on the fans to cool it for safe storage. This could also allow for a bit more drying as drying can occur when cold air is introduced to a warm mass of grain.
In-bin drying with supplement heat
Natural air drying (NAD) using aeration fans works well as long as the fan provides adequate airflow and the air has capacity to dry. The second requirement can be a challenge because cool fall air often has low or no capacity to dry anything. That is why more farmers are adding heaters to their aeration fans.
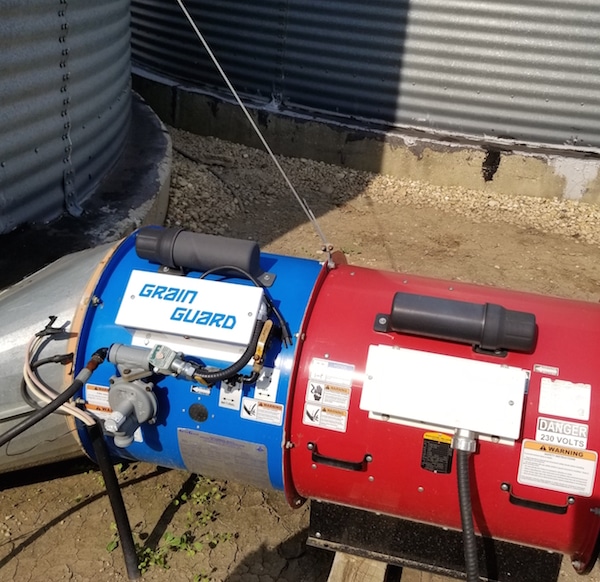
Increasing the temperature of the incoming air basically reduces the relative humidity (RH) of the incoming air, which increases the capacity of air to hold (and therefore remove) moisture. This increase its efficiency of drying the grain. For every 10°C increase in air temperature, the RH is cut in half.
A heater certified and designed for use with grain storage aeration fans can turn a “poor” drying day into a “good” drying day, and the capital investment is much smaller than it would be for a batch dryer set up. Generally, a poor drying day is when RH is 70 per cent or more, or the temperature is 10°C or less.
The general recommendation for adding supplemental heat to an aeration system is to increase air temperature to no more than 15-20°C – although the higher the fan’s airflow (cubic feet per minute) per bushel, the more heat you can add.
Airflow rates needs to be at least 1.0 cfm/bu for moisture removal. Insufficient air flow can result in a high moisture zone near the top of the bin that can initiate spoilage. The greater the depth of canola in the bin, the more fan capacity you will need to move air through it effectively. Large diameter bins that provide uniform air flow through a perforated floor may have an advantage when handling damp grain. If you suspect the air flow is insufficient, remove some canola to reduce the depth. Side benefits of removing some grain are that it disrupts any high moisture areas that are developing and it flattens the cone, which could help to make the airs path more consistent throughout the bulk. (More detail on airflow in this article.)
Temperature of the grain itself plays a role in the efficiency of NAD with supplemental heat. If the grain is already cool (less than 5°C), NAD with supplemental heat will initially add moisture to the grain. It will take some time before drying starts, but the bulk will warm up eventually and drying will be accomplished. If the grain is still warm (close to the temperature of the air you are introducing into the bin), then NAD plus supplemental heat can work very well.
Make sure to have good ventilation at the top of the bin to allow warm, moist air to escape. Inadequate ventilation in the headspace will result in condensation on the top layers of grain.
For effective drying using supplemental heat, the bin needs to be turned frequently – every day to every few days. Without turning, it will take substantial time for the drying front to reach the top layers of the bin.
And finally, monitor regularly during and after the drying process. Cool the grain after drying, aiming for a safe storage temperature of less than 15°C. Note that blowing cool air on warm grain will remove some additional moisture, so drying may be complete when moisture is within one percentage point of the target.
For more details, read the PAMI factsheet “Using supplemental heat to manage grain in the bin,” which covers frequently asked questions. The factsheet is available at pami.ca. For lots more on canola storage, see ‘Storage tips’ under the Harvest & Storage tab at canolawatch.org.
What about blending dry and damp canola? If considering blending in an attempt to bring damp canola down to tough, be very careful. It is possible you could just be putting your dry canola at risk, as the transfer of moisture from seed to seed is a slow process.
Very damp canola
Canola harvested at 15-20% moisture can be dried to a safe storage level given the use of hot air drying or supplemental heat but it should be done immediately after harvest as damp canola is at very high risk for spoilage. Even if temperatures are cold at harvest, spoilage can happen quickly with any spike in outside temperatures. When using a dryer, the recommendation is to remove no more than five percentage points of moisture per cycle, so canola above 15% moisture will required two runs through the dryer. Given how long it can take to dry canola to that extent, farmers may need a harvest plan to manage the drying process as the combines and trucks are rolling. Make sure damp canola (like all canola) goes on aeration immediately after harvest while waiting for the dryer.
Farmers putting damp canola into bags, note that this is a high risk situation especially given the likelihood that warm days, which can quickly warm up canola at the edge of the bag, are still possible before winter. Read more on bag storage of canola.
Spring drying
In recent years with delayed and challenging harvest conditions and no in-bin drying potential, producers have opted to cool and eventually freeze bulks of canola to store over the winter. This strategy has worked quite well for producers who have taken advantage of warmer, longer days in the spring to accomplish drying with NAD. This article has more tips on spring-drying.
Anecdotally, it seems that canola over 15% can have too much free moisture and actually freeze into a solid block, creating obvious flow issues.
More…
- Canola Encyclopedia section on storage
- Canola Research Hub: Study on adding supplemental heat
- Questions about handling high-moisture canola
- Storage risks for canola
- PAMI – Supplemental Heating FAQs
- Fan limitations in large bins
- Conditioning tips for stored canola
- Country Guide: Turn up the heat on aeration fans
- No matter how dry the harvested crop, all canola should be conditioned after it goes into the bin.