Canola producers can lose a lot of crop when combine setting are wrong for the conditions. Here are tips to measure combine loss and adjust the combine to limit those losses. This short video has similar instructions. For more on harvest loss management, please check the Canola Encyclopedia.
Step 1. Measure losses
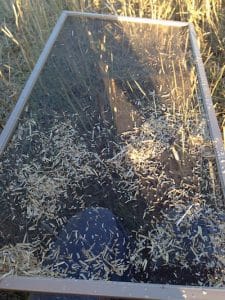
Electronic loss monitors will not accurately measure losses out the back of the combine. They give a vague idea whether losses are going up or down. Measuring true losses out the back of the combine requires a drop pan. Over time, operators can start to match loss measurements to the yield loss monitor indicator. There are three drop-pan options:
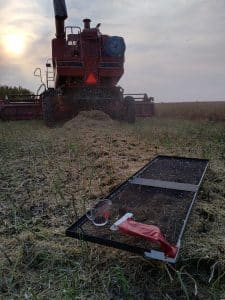
- Option 1. Full-width pans that attach under the belly of the combine. This is likely most accurate and safest option, and the combine operator can perform checks on their own.
- Option 2. A pan mounted on a stick. Operaters can target a specific source of loss (right or left side, off the chaffer or off the rotor).
- Option 3. A “throw pan.” Operators throw the pan in front of the rear wheels to land in the discharge area. This method is the hardest to control, with the potential for running the pan over, not having it land in the appropriate spot, or tipping over in the stubble. Beyond that, there are serious safety issues with such a method.
A pan that is equal to the width of the discharge area can remove sampling error and allow for one measurement to indicate total losses, but it will not tell you where losses are coming from. A smaller pan requires multiple measurements across the width of discharge, but better indicates whether loss is from the left or ride side of the sieves. Any size pan can be used – you just need to know its square footage to perform the loss calculations.
Steps to take a sample
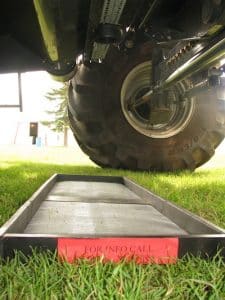
1. Disengage the spreading mechanism and move it out of the way. That way, all straw and chaff drop on the pan. This is important for accurate calculations.
2. Drop the pan, throw the pan or hold the pan. When using the stick pan, move it into position upside down so it doesn’t gather any losses ahead of time. To position the pan, walk behind and to the side of the rear wheels and extend the pan to the front of the chaff and straw discharge area. Once the pan is in position, quickly flip it over and stand still until the combine has passed over the pan.
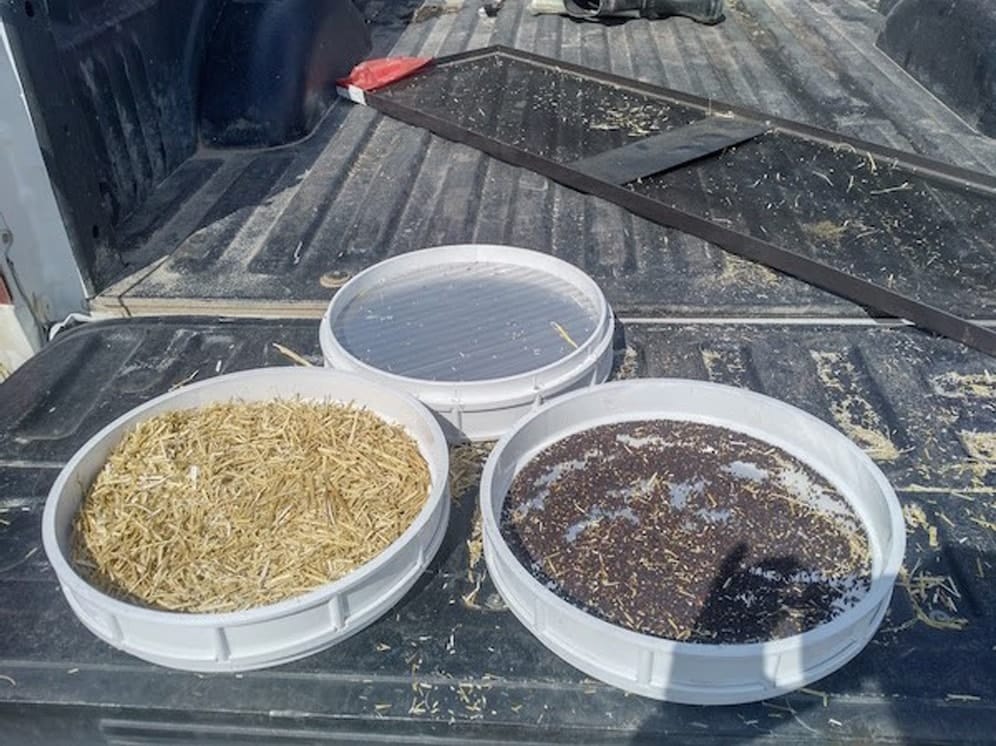
3. Remove the straw and chaff and preserve only the seed. You can do this by hand, but a screen and sieve work best.
How to calculate loss per acre
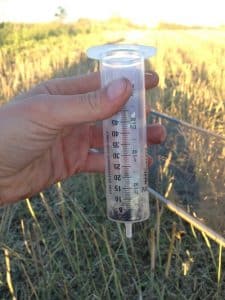
1. Measure the seed in the pan, using weight or volume. The weight method is more precise, but the volume method may be slightly easier to perform in the field. For more on these options, refer to the Combine Seed Loss Guide.
2. Calculate based on one square foot. If your pan is two square feet, for example, divide the measurement in Step 1 by two to get the total for one square foot.
3. Determine the concentration factor for your combine. This is a ratio of header width and combine discharge width. If picking up a swath, this will be based on the swather width.. For example, if the cut width is 30 feet and the discharge width is five feet, then the CF is “6.” If spreading straw, the CF is equal to approximately 1. Find the tables.
4. Plug these numbers into the tables to get losses in pounds or bushels per acre. For example, if the cleaned sample amounts to 6.2 grams per square foot and the combine CF is 6, this converts to a loss of 100 pounds per acre — or two bushels per acre. Use the Harvest Loss Calculator.
5. Take another sample before moving on to steps 2 and 3.
Step 2. Determine whether those losses are acceptable
A one per cent loss is about the best you can expect. Combines running efficiently will lose some grain. If the target is zero losses, the combine may be running too slow to harvest in a timely fashion.
An acceptable loss rate strikes a balance between productivity, saving grain, and a clean sample. One per cent is a good target, but three per cent might be acceptable if the harvest season is tight and it means the combine can operate a little faster.
Straw conditions can be the limiting factor. If setting changes and speed changes do not significantly change the degree of threshing losses, the only answer may be waiting for more drydown. The risk of waiting needs to be weighed against the potential for reduced losses.
Step 3. If losses are too high, take steps to lower them
Our Combine Optimization Tool walks the user through a step by step process to diagnose combine issues. This video explains the tool’s functionality.
Check for leaks. Losses do not always come out the back end. Before making any adjustment to cylinder speed, concave spacing, fan speed or sieve spacing, look for holes and cracks on the pickup, feederhouse, elevator, shoe seals, separator covers and the grain tank.
Feed the combine properly. Rotaries work best with a narrow windrow. Conventional walker combines work best with a wider swath that creates an even mat over the full width of the cylinder and walkers. In PAMI research conducted by Les Hill, where an even mat resulted in losses of 2.2 per cent, losses rose to 7.5 per cent when the bulk was concentrated down the middle and 12.3 per cent when the bulk was on one side. The reason is that air can’t move through the concentrated mass.
Slow down. It may take just a small decrease in speed – say 0.2 or 0.3 mph – to provide a significant reduction in losses. The loss curve tends to remain fairly flat until ground speed reaches a critical point when combine capacity is taxed. At this point, the loss curve can rise steeply. “When a combine hits that wall, a lot of the time it’ll start dumping grain out the back,” Hill says.
Make adjustments. Start with the manual’s suggested settings and go from there. Change only one variable at a time and check losses in between so you can be sure what has either helped or hindered the loss situation.
When considering adjustments, here are a few specific situations and possible solutions:
- If you find unthreshed pods in the chaff, the combine is underthreshing. Increase cylinder or rotor speed, narrow the concave setting, add concave blanks, or slow down.
- Losses can also result from overthreshing, or going TOO slow. If straw is getting pulverized into small pieces that drop down to the sieves, thus reducing air flow and separation, this is usually a result of overthreshing. Cracked seed is another sign of overthreshing. Consider lowering the cylinder speed,widening the concave setting or switching to less aggressive concave sections. This adjustment may also make it possible to drive faster and keep losses constant.
- For more of these scenarios, please read the Combine Seed Loss Guide Combine Seed Loss Guide and try the Combine Optimization Tool.
More…
- The Combine Optimization Tool at canolacalculator.ca can guide you through settings adjustments.
- Harvest loss section of the Canola Encyclopedia
- PAMI study measures actual combine loss
- Timely harvest topics: Wind, dockage and more
- “Losses can be ‘That bad!'” – Article from Canola Digest September 2019
- Measuring harvest loss – Common questions
- Top 10 harvest questions, including “How can I harvest sooner?”

